The autumn equinox is about a week away. Bringing us crisp apples to eat, hawthorn berries ripening red on the trees and brightly colored winter squash speckling the field. Fall is a really lovely time in Southern Oregon. The nights begin to cool and moisten but we still get some warm days above 85 degrees. It is time to catch those less remnants of summer and to preserve the harvest.
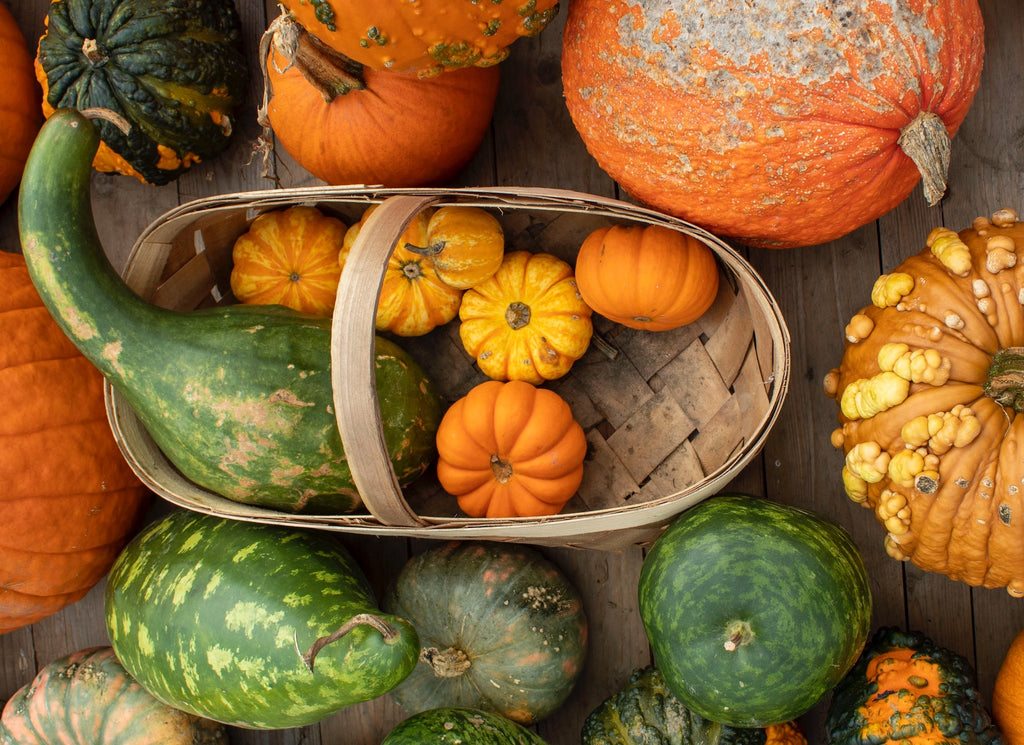
Winter squash is an excellent plant to grow because it can be stored and eaten throughout the winter. It has tons of vitamins, protein and fiber. There are three species of winter squash commonly grown. Cucurbita moschata home to Waltham Butternut, Kogigu and Tromboncino and Cucurbita pepo species which includes not only pie pumpkins, delicatas and acorn squash but also common summer squash varieties like zucchini. Finally, we have Cucurbita maxima which include cultivars such as Baby Blue Hubbard, Black Forest Kabocha, and the delightful Sundream.
Squash are one of the last of the summer plants to be harvested. When you plant your squash seeds in the beginning of summer make sure the variety you choose has enough time to mature before your first frost date. Knowing approximately when your first and last frost dates are is an important step in planning any garden
Checking for Maturity
Winter squash mature at varying rates. Some varieties can take up to three months to mature while others are finished in 2 ½ months from planting. There are a few things to look for when deciding whether your squash is mature enough for harvest. The two categories of maturity to look at are the quality of the fruit and the horticulture maturity indicators.
In order to be fully mature squash should have hard rinds. You can press your thumb nail into the rind to test for hardness. Your fingernail should not be able to penetrate the rind. The skin should be a nice solid color and will transition from a shiny bright color to a matte color when the squash are ready.
The stems of the plants should be “corked”. This means that they have turned from green to a shade of pale brown. Immature fruit will still have somewhat fleshy green stems.
Other possible indicators could be the dieback of the tendril located where the stem of the squash meets the plant and a pale yellow spot where the fruit meets the ground aka a groundspot, similar to how a watermelon indicates ripeness.
Harvesting
Winter squash should be cut and harvested before your first frost. Frost can damage the fruit and lead to rapid decay in storage. Allowing the squash to become too mature can also lead to early decay issues.
Cut the stems of the squash about 2-3’ above the fruit. It is easiest to use loppers for this as stems can become quite hard. Most squash should be stored with the stems still attached. An exception to this are the hubbard cultivars which will rot more rapidly if the stems are left on.
The fruit needs to cure for about 10 days before it can be stored. This can be done in the field or in a dry ventilated indoor space. If you cure them indoors, use a fan and a small heater that you can control the temperature on. I usually leave my squash in the field to cure mostly because it is easier. Check the weather. If there is frost or rain coming up in the next 10 days you should pull them from the field. You can cure them on pallets or racks. Curing should be done at about 80-85 degrees with a RH (relative humidity) of 60-70%.
If you cure your squash properly they will last much longer in storage. Curing is thought to harden the rind of the squash. It also allows the squash to heal any minor cuts that may have occurred during its growing season.
Storage
Before you place your squash into storage, wipe them clean with a damp rag to remove all dirt and debris. Dirt can contain moisture, fungus and bacteria that will make your squash rot. Dry the squash with a clean dry towel.
One of my favorite food preservation books is Preserving Food without Freezing or Canning, a compilation of tips from French gardeners. There are two recommendations for squash storage in the book. One is to wipe the squash with a rag dipped in vegetable oil. The other is to wrap each squash in a layer of newspaper (I probably would use unwaxed butcher paper without ink). The oiled rag method works really well. I have not tried the newspaper method.
You can also just put your clean squash on a shelf, rack or in a basket. Do not store your squash on concrete floors as they are often cold and can accumulate moisture.
Choose a place that has a relatively stable temperature and at least some airflow. Squash stores best at temperatures between 50-55 degrees with an RH of 50-75%. Last year I stored mine in an old wine cellar, it was the best place I have ever used to store squash. The spaghetti squash I stored there lasted until late spring. I know it can be hard to store your crops at the recommended temperatures but the effort is really worth it. Your squash will last a lot longer. If you garden on a large scale it might be time to set up a food storage area in your house or an out building where you can control the temperature and moisture level.
Each variety of squash stores for a slightly different length of time. Generally, you can expect your squash to store for 2-6 months. Every once in a while go through your squash and check for signs of decay such as soft spots of mold. Remove these squash. If they are good enough and you caught it early you can still eat them. Make sure to clean up any liquid that may have been released by the rotting fruit. Wipe down any other squash that came in contact with the rotten one. This will help the rot from spreading.
If you do see a lot of rot and mold in your winter squash it may have been introduced where the squash was grown. Rotate where you plant your squash crops. Try to plant them in areas with good drainage and try to keep them weed free.
Instead of storing the whole squash you can process it. Squash can be cubed and boiled before canning in a water bath. Be sure to consult canning charts to ensure proper processing time and acidity levels. I also know some people who cut their squash and dehydrate or freeze dry it for later use. It really depends on what kind of space and time you have.
Happy Fall!
Taryn Hunter
Lead Seed Coordinator, Siskiyou Seeds
Reference List
Arvayo-Ortiz, R. M., Garza-Ortega, S., & Yahia, E. M. (1994). Postharvest Response of Winter Squash to Hot-water Treatment, Temperature, and Length of Storage. HortTechnology horttech, 4(3), 253-255. Retrieved Sep 12, 2023, from https://doi.org/10.21273/HORTTECH.4.3.253
Brecht, J. K. (2004). Pumpkin and winter squash. The commercial storage of fruits, vegetables, and florist and nursery stocks (Preliminary On-line Version-Draft Revised 2004). USDA, ARS. Agriculture Handbook, 66.
Cantwell, M., & Suslow, T. (2002). Pumpkin and winter squash. Recommendations for maintaining postharvest quality. Postharvest Technology Research Information Center. University or Califomia, USA. Produce/ProduceFactsNeg/pumpkin.html.
Gast, K. L. (1994). Harvest Maturity. Indicator for Fruits and Vegetables. KansasStateUniversity. Agri. Experiment station and cooperative extension service. MF-1175, 1-4.
Mansour, N. S. (1979). Storing pumpkin and winter squash at home.
Motes, J., Roberts, W., Damicone, J., Edelson, J., & Duthie, J. (2007). Squash and pumpkin production. Oklahoma Cooperative Extension Service.Preserving food without freezing or canning: Traditional techniques using salt, oil, sugar, alcohol, vinegar, drying, cold storage, and lactic fermentation (D. Cote, Trans.). (2007). . Chelsea Green Pub.
U.S. Department of Agriculture, Extension Service. (1989). Guide 4. In Complete Guide to Home Canning (Vol. revised 2015, pp. 4–18). essay.
Zitter, T. A. (1992, January 1). Fruit Rots of squash and pumpkins. Home. https://ecommons.cornell.edu/handle/1813/43274
Comments (0)